

A profile can be complete and still wrong. A field that is filled in is not necessarily a field that is correct, and an edit you saved is not necessarily an edit Google published. This article is a field-by-field pass for a profile that already exists: name, categories, address, hours, description, services, attributes, links and photos, each checked against the business as it runs today, followed by a log that shows which edits went live.
The work before this pass and the work after it have their own articles. Getting a profile onto Maps is covered in creating a profile, claiming an existing one and verification. How Maps ranks the result, and how to measure it, is in the ranking guide. Finishing every applicable item here does not guarantee a Maps position, because distance and prominence count as well.
Before you edit: the right profile, access and a saved copy
Open the profile that represents the business you are authorized to manage, signed in with the Google Account linked to it. Confirm it is the listing you mean and not a duplicate, check who has access, and save the public profile link together with a dated copy of the values you intend to change. A later discrepancy is much easier to investigate from a record than from memory.
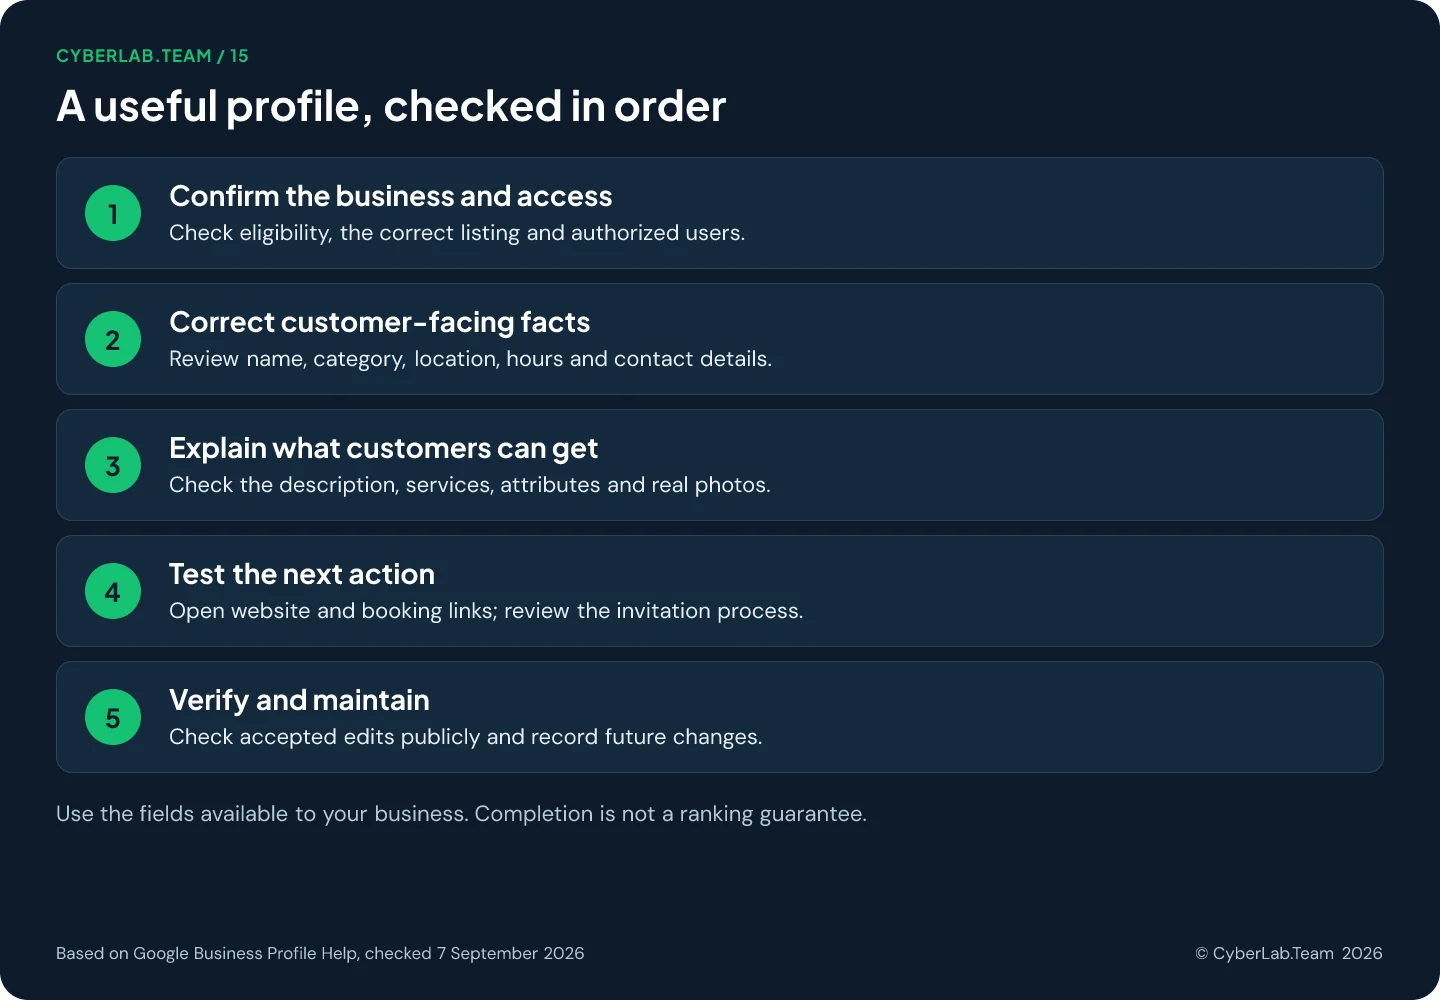
Google documents editing through Search and Maps, but the controls differ by device and interface. In Search, open the profile and select Edit profile to inspect the main information. If someone else controls the listing, follow the guide to claiming an existing business on Google Maps. If a verification request is outstanding, the methods Google offers are explained there; if a postcard is already on its way, Google’s instructions warn against changing the name, address or category while you wait for the code.
Roles and who may do what are a handover question, so they sit in keeping a profile accurate over time. For this pass it is enough that each person edits from their own account.
Mark each item as you go: correct, needs correction, awaiting review or not applicable. A feature that is unavailable for your category or region is different from a field you have forgotten to complete.
Step 1. Check the name and business categories
Use the name customers see on your sign and documents, with no added cities, services or slogans. Pick the most specific primary category on Google’s list that matches the main activity, keep additional categories to real parts of the business, and note why any category changes, because a change can send the profile back to verification.
The name is the one customers recognize from your real-world branding. Do not attach extra city names, services or sales language to target searches; Google’s rules place those details in their own fields.
Check the primary category against what the business mainly does. Choose a specific matching option from Google’s list. If that option does not exist, use an appropriate broader category; you cannot create a custom one.
Review additional categories one by one. Each should describe a genuine part of the business, not every product on the shelf or a separately operated company sharing the building. Google recommends the fewest categories needed to describe the core business.
Record the reason for every category change. A category edit can trigger another verification request, so do not experiment with unrelated choices just because a competitor uses them.
Step 2. Verify the address, pin and service area
Compare the full address, unit details and the map pin with the real premises, and move a wrong pin to the actual building rather than toward a market you want. A business that visits customers hides its address and lists the areas it serves; a hybrid one can show both. Service areas are places, not a radius.
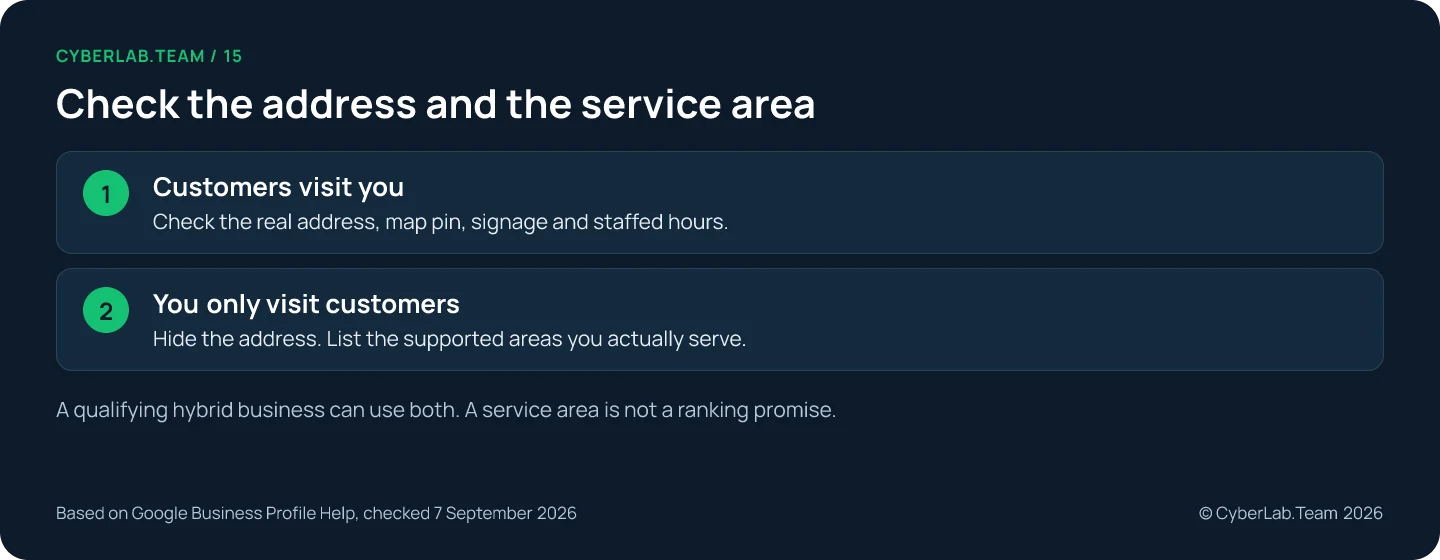
For a customer-facing location, check the complete physical address and the relevant unit details. Inspect the pin too. An address that reads correctly as text can still leave a customer unsure which entrance or building to approach.
Use Location in the profile editor to review the business location and adjust an incorrect pin to the actual premises. Wrong driving directions can be reported separately. Moving a pin toward a preferred market is not a factual correction.
If you visit customers and do not receive them at your business address, remove the address from public display and provide the service area. A hybrid business can show both when its premises meet Google’s customer-reception and signage requirements.
List the cities, postal codes or other supported areas you actually serve. The service-area field uses areas rather than a radius setting. Remove places you no longer cover; adding a place is not a promise of ranking there.
Take a repair business that has stopped visiting one town. It should update its coverage and its website at the same time, because the correction prevents an avoidable inquiry about a service it can no longer deliver.
Step 3. Separate regular, special and service hours
Regular hours describe a normal week, including a midday break as two opening periods. Special hours cover single dates such as holidays, and Google suggests confirming them even when nothing changes. More hours describe a particular service, such as delivery, and need regular hours first. After any change, update the website and booking confirmations too.
Check the schedule customers can rely on during a normal week. Where the business closes for lunch, enter separate opening periods. Keep a dated exceptional closure out of the regular weekly schedule.
Special hours handle particular dates, such as a holiday or an event. Google recommends confirming official-holiday hours even when they match the normal schedule. Review upcoming exceptions against the business’s actual plans.
More hours describe different operating times for particular services, such as pickup or delivery. They are distinct from special dates, require regular hours to exist first and should generally fall within the main hours.
Do not add a generic schedule to every kind of business. Google’s representation guidance lists exceptions, including appointment-only operations and certain businesses with varied activity schedules. Use the rules relevant to your business type.
Check the website and appointment instructions after changing the profile schedule. A correct listing cannot prevent confusion if a confirmation message still sends customers to an old opening time.
Step 4. Write a factual description and service list
The description has up to 750 characters and explains what the business does and who it serves, with no links, HTML, prices or promotional pitch. If Google offers an AI-written draft, check every claim before saving. In the services section, list only what customers can actually book, with real prices in the price fields, and keep the wording natural.
Use the description to explain the main offering and the details that help someone decide whether to contact you. Include history or qualifications only when the business can substantiate them.
The field allows up to 750 characters. Google excludes URLs and HTML, and its guidelines say the text should not focus on promotions, prices or sales. Use the links and service fields for that information.
If an AI description option appears, review each statement before you save it. Google warns that the feature produces creative text and may need correction, and it is available only in certain regions and languages.
Where Edit services is available, inspect the suggested services and any custom entries. Add useful descriptions and actual prices in their designated fields. Prices and phone numbers do not belong in custom service names.
List the services customers can genuinely book. Remove obsolete services and descriptions that imply work your team cannot provide. If two similar names are hard to tell apart, explain the difference in plain language.
Keep the wording in the language customers use. A translated search phrase can help you consider terminology, but it is not a reason to repeat every keyword variant in the description or to create duplicate service entries.
Step 5. Confirm relevant attributes
Attributes are the practical yes-or-no facts: payment options, amenities, accessibility. Answer only what you know is true, and ask someone who knows the premises about anything uncertain. Accessibility features are separate questions; a wheelchair-accessible entrance says nothing about the restroom or parking. Some attributes come from customers, and the options differ by category and country.
Attributes describe details such as amenities, payment options or accessibility features. Review the options available under Edit profile and More. Some information is directly editable; other attributes come from customer input.
Answer factual attributes accurately. Ask a colleague familiar with the premises to check an uncertain detail instead of selecting Yes to make the profile look more complete.
For accessibility, read Google’s definition of the particular feature. A wheelchair-accessible entrance, restroom and parking space are three separate questions, and confirming one does not establish the others. Keep specific access information available to the staff who answer inquiries.
Options vary by category and location and may change over time. Record an unavailable attribute as unavailable, then explain any essential customer information on an appropriate website page.
Step 6. Test phone, website and action links
Call the number and follow the menu to see where a new caller lands. Open the website link on a phone and check that it names the right branch, explains the service and offers a next step. Try each booking, order or social link without completing a purchase, and investigate any link you did not add before assuming a breach.
Confirm that the phone number reaches the correct business location and is under the business’s control. Test the route a caller follows, including any menu or voicemail instructions, against the way the team currently handles inquiries.
Load the website link on a mobile device. Does it identify the right business or branch, explain the relevant service and provide a usable next step? Record the first obstacle, such as an outdated destination or an incorrect contact number.
Review the action links available for the profile, such as bookings, orders or reservations. Test the intended destination without placing a real order. If several links are present, inspect which one is marked as preferred.
Google may add some partner links automatically. An unfamiliar booking link therefore needs investigation, but it does not by itself prove that someone has gained access to your account. Google provides a provider-removal route for these links.
Where social links are available, confirm that each opens the correct account. Google allows one link per supported platform and notes that the feature is regional. Its documentation does not provide click tracking for these links.
Step 7. Review photos as a customer would
Look at the photos the way a first-time visitor does: can they recognize the entrance, see the space they will use and understand the work you do? Replace pictures that no longer match the premises, avoid heavy filters, then check the public listing, because the cover you choose may not be shown first and pending media stays invisible.
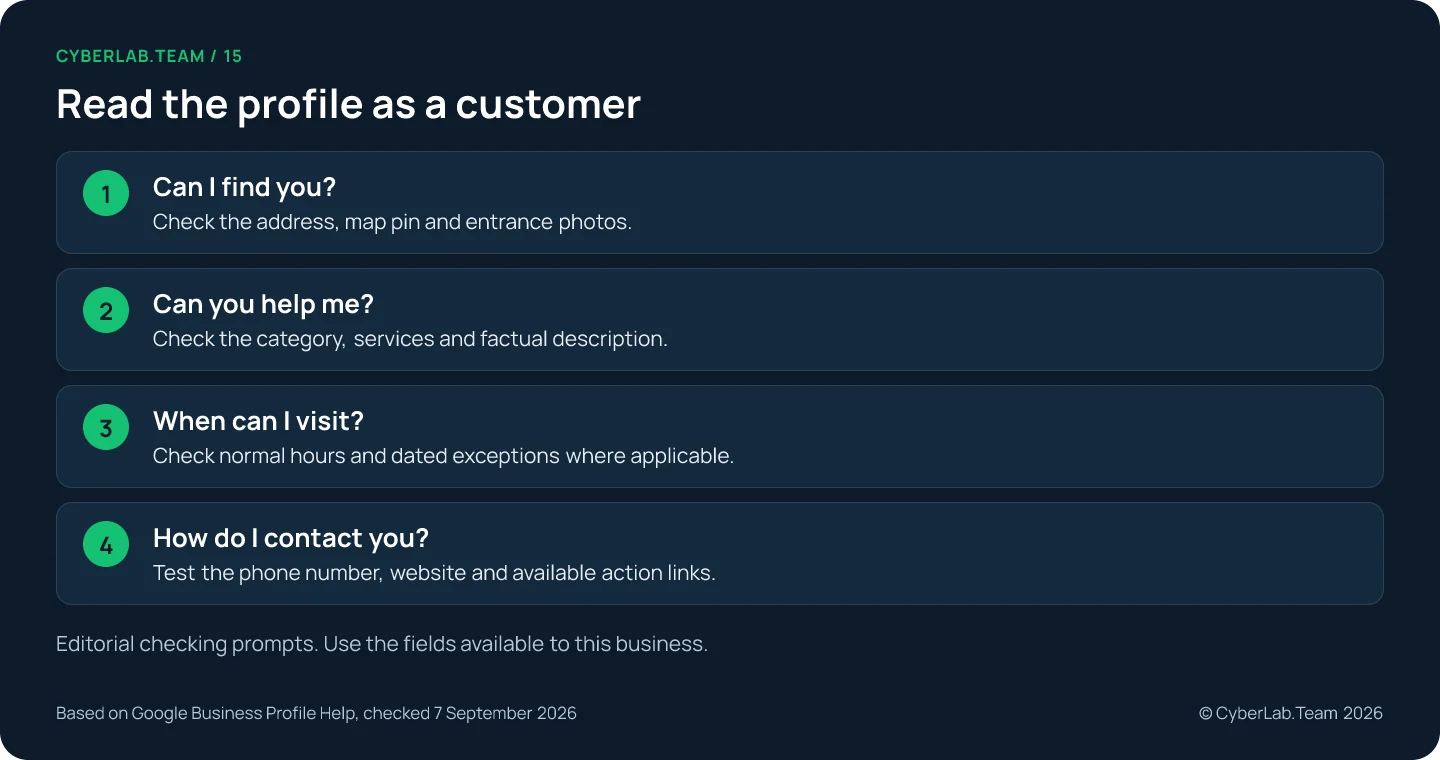
Choose images that help someone recognize or understand the actual business: the entrance, the relevant interior, products or work in progress. A photo earns its place when it answers a question the text cannot answer as clearly.
Check whether the visible pictures still match the premises and the offering. Replace your own obsolete material where appropriate. Use clear, well-lit photos that depict reality, without significant alterations or excessive filters.
Select an appropriate cover and logo, then inspect the public result. Google does not guarantee that the cover you select will appear first. Uploading an image and seeing it displayed publicly are two separate checks.
Review media status if something is missing. Google distinguishes pending, not approved and live media. Pending content is not visible to customers, so read the stated issue before submitting the same file again.
Step 8. Decide who reads and answers reviews
Steps 1 to 7 cover what the profile says; reviews are what customers say, and the process for asking for them and answering them lives in the reviews guide. For this pass, check three things: a named person reads new reviews and can reply, replies leave personal information out, and repeated complaints are treated as maintenance prompts.
Replies from a verified profile are public and are reviewed by Google, so keep them free of personal data and move an individual investigation to a suitable private channel. The rules on inviting reviews, including the ban on incentives and on asking only the customers who seem pleased, are set out in the reviews guide and in Google’s contribution policy, not repeated here.
Use recurring concerns as prompts for the fields above. If several customers describe difficulty finding the entrance, inspect the address, directions and photos. That is the practical link between reviews and the rest of this pass.
Step 9. Verify edits and record the result
An edit is finished when the public profile shows it, not when you press save. Google marks edits accepted, pending or not approved, and it can change details on its own from other sources. Keep a log with the submitted value, the status and an acceptance check per item, and read Performance clicks as clicks rather than as confirmed leads.
Test the public profile once an edit shows as accepted. Accepted means the updated information displays; pending means it is still under review.
If a change is not approved, check its accuracy and the applicable rules before deciding whether to correct or appeal it. Keep the submitted value and the status in your record. Some information can be edited before verification, but full editing requires a verified profile.
Check unexpected changes as well. Google gathers business information from other sources and can update a profile with it. You cannot manage every such update through the editor, so record what changed and investigate the relevant source or support route.
Use a small work log with a specific acceptance check for each item. The checks below are an editorial template, not Google requirements or a ranking score. Adapt them to the business and the fields it actually has.
| Item | Evidence to keep | Check after the change |
|---|---|---|
| Hours | Approved business schedule and exceptional dates | Public profile shows the intended schedule |
| Location | Confirmed address and current entrance information | Pin and directions point to the actual place |
| Services | Current offering confirmed by the team | Relevant available services are described accurately |
| Contact paths | Correct number and destination URLs | A customer can reach the intended business or action |
| Maintenance | Person responsible, date and edit status | Unresolved items have an owner and a next step |
Assign someone to check future changes. Review the affected fields when hours, premises, services or contact arrangements change, and choose a routine for checking new reviews and Google updates. One such routine, with the order of checks, is described in keeping a profile accurate over time.
Business Profile Performance shows interactions over a recorded period, but a click on the call button is not a completed conversation, and a rise after an edit does not by itself prove the edit caused it. How to read those numbers next to your own inquiry records is covered in the ranking guide.
Where a finished list stops
A finished list means the public profile is accurate and usable: someone arriving, calling or clicking finds what the profile promised. It does not mean a position. Google’s local results also depend on distance and prominence, and Google does not sell a better organic position, so judge the work by correct information and relevant inquiries as well as visibility.
If you would rather hand the pass to someone else, CyberLab’s Google Business Profile service does the field-by-field correction. Send the profile link and the fields where the public listing differs from what you intended, and say which of them you have already tried to change.
Sources
Google guidance last checked 7 September 2026.
- Google Business Profile Help. “Edit your Business Profile.” https://support.google.com/business/answer/3039617
- Google Business Profile Help. “Guidelines for representing your business on Google.” https://support.google.com/business/answer/3038177
- Google Business Profile Help. “Choose a business category.” https://support.google.com/business/answer/7249669
- Google Business Profile Help. “Manage your business address.” https://support.google.com/business/answer/2853879
- Google Business Profile Help. “Manage your service areas.” https://support.google.com/business/answer/9157481
- Google Business Profile Help. “Manage your business hours.” https://support.google.com/business/answer/15300403
- Google Business Profile Help. “Set special hours.” https://support.google.com/business/answer/6303076
- Google Business Profile Help. “Set more hours.” https://support.google.com/business/answer/9876800
- Google Business Profile Help. “Manage your business description.” https://support.google.com/business/answer/13682007
- Google Business Profile Help. “Manage your services.” https://support.google.com/business/answer/9455399
- Google Business Profile Help. “Manage your business attributes.” https://support.google.com/business/answer/9049526
- Google Business Profile Help. “Manage your local business links.” https://support.google.com/business/answer/6218037
- Google Business Profile Help. “Manage social media links.” https://support.google.com/business/answer/13580646
- Google Business Profile Help. “Manage photos or videos for your Business Profile.” https://support.google.com/business/answer/6103862
- Google Business Profile Help. “Business-specific photo tips.” https://support.google.com/business/answer/6123536
- Google Business Profile Help. “Manage customer reviews.” https://support.google.com/business/answer/3474050
- Google Business Profile Help. “Understand what happens to your Business Profile edits.” https://support.google.com/business/answer/3038311
- Google Business Profile Help. “Understand Google updates.” https://support.google.com/business/answer/3480441
- Google Business Profile Help. “Understand your Business Profile performance.” https://support.google.com/business/answer/9918094